The Uttar Pradesh Farmer Registry is a government of Uttar Pradesh undertaking for the welfare of state farmers. It is a state-backed initiative under AgriStack, the primary purpose of which is to create a centralized database for the ease and benefit of the farmers of Uttar Pradesh. By offering a seamless link between Aadhaar, land records, and banking details, the UP Farmer Registry ensures a higher level of transparency, financial benefits and fraud prevention for the farmers.
However, before delving further into Kisan farmer registry UP, let’s discuss in some detail about AgriStack. It will help us clearly understand the purpose of Kisan farmer registration in the UP, and the specific purpose for which it was created.
The AgriStack Farmer Registry is one of the primary initiatives launched by the Government of India for the farmers of India. The primary purpose of its creation is to digitize the entire agricultural records in India so that farmers can easily access their land records and sundry other data associated with their agricultural lands. Registry is linked with Aadhaar thus offering a genuine validation of records. This registry which acts as a centralized digital repository for state farmers offers easy identification of farmers and their land. This in turn helps in financial as well as social upliftment as validated farmers can obtain access to a plethora of benefits offered by both the state and the central government.
Farmer Registration Process for AgriStack
AgriStack is an initiative by the Ministry of Agriculture & Farmers Welfare. Farmers intending to get registered for AgriStack should follow the below-mentioned processes. The Farmer registration under AgriStack is done through Aadhaar authentication. Also, land record verification and e-KYC is done to get a farmer registered. Once a farmer is registered, they can obtain access to a variety of government benefits, along with various subsidy schemes and financial aid offered by the Government from time to time.
Here is a step-by-step guide for the farmer registration process under AgriStack
Registration & Login: Farmer Registry UP
First and foremost, the farmer intending to register for AgriStack must visit the state-specific (the state to which the farmer belongs) Farmer Registry UP portal to begin the process of registration. Alternatively, they can also get it done physically by visiting a Common Service Center (CSC) to initiate the registration process. Additionally, registration is also offered through the agriculture department. There are even mobile apps available for this purpose.
The next step is to select and press enter on the “Farmer” tab on the homepage and then click on the tab marked “Create New User Account”. This is meant for farmers going for first-time registration.
After that, enter the Aadhaar number. Then tick on the declaration box and press the submit button. An OTP will be sent to the mobile number that is linked to your Aadhaar card. You need to enter the OTP that has been sent on your mobile in the box. Press the enter button. After that, you are taken to the Login page. Enter your username which will be your mobile number. Also, choose a password and enter the Captcha displayed.
Click Login to view all your details. Go to the bottom of the page and click on the “Register as Farmer” button.
This platform allows farmers to access their land records and everything associated with them with just a few simple mouse clicks as everything is digitized. Apart from ease of access to their land records: registration under this scheme also helps farmers obtain access to a variety of government schemes along with different other subsidies offered by the Government from time to time. Farmers also gain access to schemes like PM-KISAN Yojna as well as crop insurance.
Farmer Registry UP: A Step-by-Step Guide
The official portal developed by the Government of Uttar Pradesh for the Uttar Pradesh Farmer Registry is upfr.agristack.gov.in. Farmers belonging to the state can visit this portal for registration, update new details and check their eligibility for various schemes offered by the government.
Farmers of Uttar Pradesh can register on the portal to get their Farmer ID. Let’s look at the detailed process by which a farmer can register himself on the portal.
Step 1: Access the UP Farmer Registry Portal
- As mentioned above, you need to visit the official portal developed by the Government of Uttar Pradesh for Uttar Pradesh. The portal is upfr.agristack.gov.in.
- You will be directed to the Homepage where you need to click on the “Farmer” tab under Login Options.
- If this is your first time trying to get yourself registered, you need to click on “Create New User Account”.
Step 2: Aadhaar and Verification of your Mobile Number
- You need to enter your Aadhaar Number and click on the tick the Declaration Tab.
- After you click on the Submit button you will receive a notification that an OTP has been sent to your registered mobile number i.e. the mobile number that is linked with your Aadhaar card.
- The next step is to put in the OTP number received in the appropriate box.
Step 3: Login & Farmer Registration
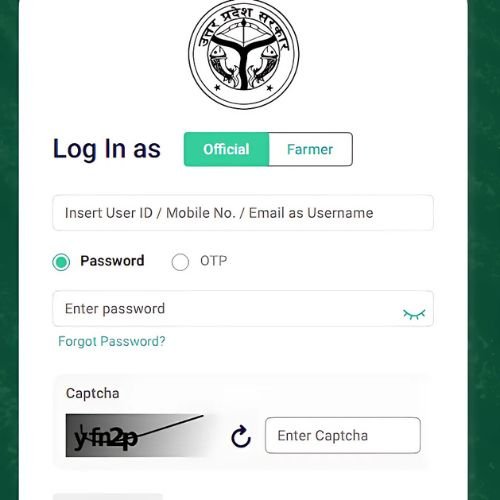
- Enter your username which will be your mobile number. Also, choose a password and enter the Captcha displayed.
- Click Login after which you will be taken to the dashboard.
- There you have to select and click Select “Register as Farmer” tab, which happens to be at the bottom of the page.
Step 4: Fill in Farmer Details
• The first step here is to choose the social category you belong to (General, SC, ST, OBC).
• You need to verify your name and other details that are displayed as per your Aadhaar record.
• Verify and edit (if need be) before proceeding further.
Step 6: Address & Land Ownership Details
- The address linked to your Aadhaar will be auto-filled.
- If there is a need for editing and changing details, ensure that information about your District, Sub-District, Village, and PIN Code is updated and correct.
- Choose Owner under the Land Ownership section.
- After that when prompted, you need to choose agriculture as your occupation.
- Click on the tab marked “Fetch Land Details”. All your land records will be instantly displayed.
- Enter your Khasra/Gata Number (as per Khatauni).
- Choose the Landowner’s Name and verify the details.
Step 7: Final Submission & e-Signature
- In the Approval Section, you need to choose Revenue Department.
- Click on the Declaration Box and then press on the SAVE button.
- Complete the e-signature process by entering the OTP sent to your mobile-linked number.
- The next step is to click on the Submit button. This completes the registration process.
Step 8: Confirmation of Registration and Generation of Farmer ID
- Post successful registration, a unique Farmed ID is generated for each farmer whose details have been entered.
- You need to save and remember this ID as all other communications in the future will be done through this ID.
- You also need to download your filled registration form. This will be in PDF format.
- Verification & Approval Process
- The details entered should match the land records. If there is an exact match, instant approval is granted.
- If there is a mismatch between the details entered or if there is a pending land mutation, manual verification is required.
Once everything is verified, the farmer ID is generated.
Conclusion
The UP Farmer Registry offers a host of benefits to the farmers. Landowners are offered instant access to information related to various government schemes, subsidies, PM KISAN Yojana and crop insurance. They can also obtain faster loan approvals, get real-time weather updates and access to information related to Mandi rates.
Read Also:
| भू नक्शा राजस्थान | Jharkhand Rajya Fasal Rahat Yojana |
| Madhu Babu Pension Yojana | Krishak Bandhu Scheme Registration Process |